AUTUMN SAVINGS - FREE DELIVERY AVAILABLE

£30 Off Your First Order Automatically Added At Checkout!

Assembly Instructions for All Bed Types

How ToAssemble Your Ottoman Storage Bed

Now it’s time to Assemble your dream bed! Assembling an ottoman storage bed is straight forward and simple. Just follow the instructions provided and it Should be hassle free . Firstly, unpack and get yourself familiar with each item.. Once you’ve completed these steps, you should be ready to get started.

  • Step 1

    Click in the chrome legs into each base. These lock in with a hard tap. Please  Note: once these legs are locked in they cannot be removed

  • Step 2

     Line up the headboard cutouts with the holes in the back of the ottoman base.

    Note:  The Material Behind The headboard and the base will need piercing.

    Screw in the bolts with the white washer fed into the back of the headboard. 2 bolts are provided for each side

  • Step 3

    Push in the 2 U clips,this will secure the 2 bases strongly together.

Use the plastic headed bolt to secure the lids together

Note: There is a rip in both lids to indicate where the screw will go. Also, the lids will not close if the mattress isn’t placed on top. If your bed has a footboard this can be slid. Into place  at the end once the lids are closed.

How To Assemble Your Bed frame With optional Gas lift

Assembling the Gas lift bed frame can require some expertise. The steps outlined below should help you through each part of the process. Ideally, we advise 2 people put this together to help support/align parts whilst the other person screws in bolts etc. With 2 people this process should be much easier.

Step 1

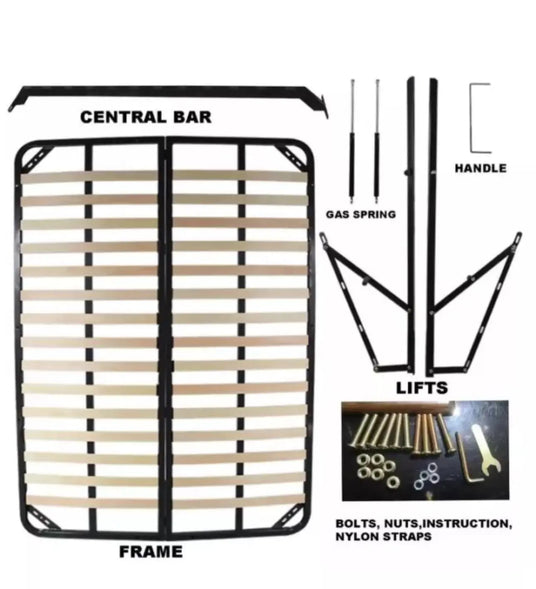
Assemble the bed frame first. Headboard, siderails and footboard. Slot in the siderails and align them to the headboard and footboard. Nuts are already attached to the bolts. You will require a size 13’-14’ size spanner. It’s ideal if you place in the long black bar which goes inside the storage base. Bolts are already attached inside the side rails. Once this step has been completed pleased insert the blackboard in place before starting to assemble the gas lift storage frame.
  • Step 2

    Open the metal slatted frame and small rectangular box which contains the  1x ‘U’ thin bar, 2 small bars and 10x bolts. There are 6x regular bolts and 4x of the Allen key style bolts. Once the metal slatted frame is opened, place the small black bars either side of the frame with the Allen key bolts provided. Place the ‘U’ bar on one of the sides of the metal frame where you have placed the smaller black bar on the side. Note the ‘U’ bar only goes on one side of the frame.

  • step 3

    Fix the gas lift pistons in place – Note: If the cylinders do not align, you may have to simply twist the hydraulic cylinders slowly until it aligns up.

    STEP 4

    Place the metal frame on top of the bed frame. Note: Where the ‘U’ is that is the head side and frame only go on one way. The remaining 6x bolts go on top of frame. 3x on
    each side.

  • NOTE: The gas lift will not close unless a mattress is placed on top. This is due to the gas lift being locked once there is the weight of the mattress on top this will unseize the gas lift and the gas lift pressure should release allowing it to work

How To Assemble Your Bed Frame With Blackboard

Assembling the bed frame shouldn’t take you no longer than 15 minutes. Below we have provided detailed steps to support you from start to finish! Note all bolts are pre-attached to our bed frames.

  • Step 1

    Unscrew all bolts attached to head and foot (Total 8 bolts)


    STEP 2

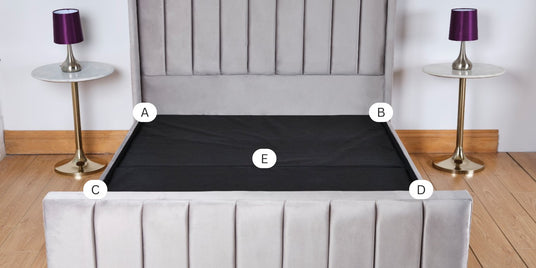
    Click in the sides both left and right on the headboard side first, marked A,B. Tighten the bolts slightly

  • step 3

    Click in the sides both left and right on the footboard, marked C,D. Tighten these bolts slightly.

  • step 4

    Place in the support bar(s) marked E. Now tighten all bolts in all 4 corners (Total 8 bolts).

Step 5

If you’re Bed Comes with a Black Board this should be placed  on top and joined together in the middle, leaving a gap at the head and foot so you can access underneath the bed.
How To Assemble Your Divan Base Bed

Now it’s time to set up your dream bed! Assembling a divan bed is an easy process. All you need to do is follow the instructions properly. First, take your time to attentively unpack each and familiarise yourself with all the accessories. Once these steps are complete, let’s get started. 

  • step 1

    Fabric drawer straps ensure that your drawers do not slide open during delivery. They are stapled on the inside of the divan base. To remove them without damaging your divan base, please follow these instructions: -

    • Cut the fabric strap across its centre to release the drawer.
    • Cut the remaining fabric strap to the desired length so it is not in the way when opening and closing the drawer.
  • step 2

    Click in the chrome legs into each base. These lock in with a hard tap. Note: once locked in the legs cannot be removed


    STEP 3

    After fitting the legs,turn both parts of the divan on their side and bring them together so that the two flat ends meet.Where the ends meet, fit the U-CLIPS so that they clamp around the underside timber piercing the mesh fabric.

  • Step 4

    Line up the headboard cutouts with the holes in the back of the base.

    Note: Material will need piercing.

    Screw in the bolts with the white washer fed into the back of the
    headboard. 2 bolts are provided for each side

How To SetUp Your Mattress

Please Note: If your mattress order includes professional assembly a member of our delivery team will take care of everything for you and also take away any packaging.

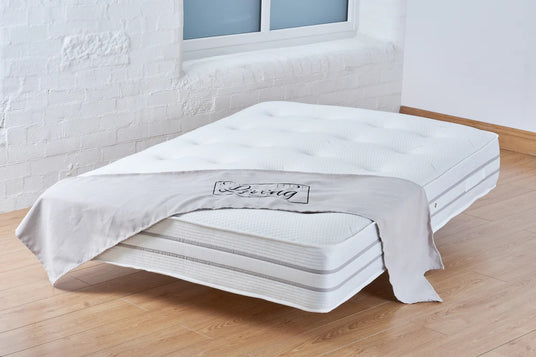
On The day of your delivery your mattress will come
wrapped in airtight wrap plastic packaging. This can be removed using any sharp item however we recommend the use of scissors or a knife. if you decide to use a knife, please be careful not to cut into the mattress fabric. Our driver will
inspect the mattress upon delivery and if you notice any damage upon delivery, please make us aware as we will not accept any responsibility later unless it is evident that the damage is due to a manufacturing defect.

If YouReceive A Roll Packed Mattress

Our Roll Packed Mattresses are manufactured in our state of the art production facility, these mattresses are then compressed and rolled, packaged and ready to be shipped out. One of the main benefits of roll packed mattresses is the amount of space it can save by being compressed it can be placed in a smaller box lowering delivery costs which are passed on to our customers.


Please Note:  once you receive your roll packed mattress and have removed it from its packaging. The mattress will take up to 24 hours to come back to its original state ready for you to enjoy. Although we state 24 hours it should reach 70-80% of its original. State in 4-6 hours and can be ready to be used . however, you must wait up to 24 hours for it to reach its normal state.